Read-Only User Role in Testomat.io
Read-Only User
Section titled “Read-Only User”Some of your company members such as managers, BA, or other stakeholders may need to have read-only access to Tests, Run Reports, and Analytics in order to read, but not change any data. You can invite read-only users or make existing users read-only on the Company page.

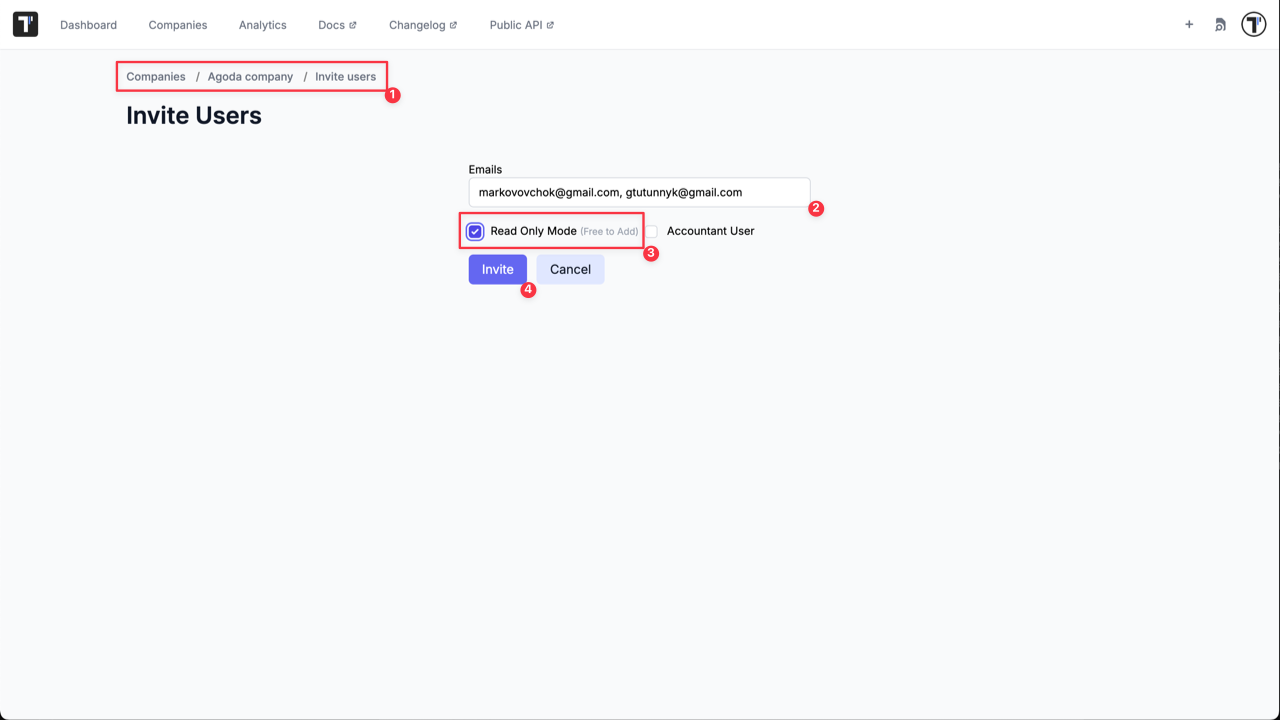
Invite Read-Only User to a Company
Section titled “Invite Read-Only User to a Company”- Click on ‘Invite’ button from Company page.
- Enter valid user’s email.
- Select ‘Read Only Mode’ option.
- Click ‘Invite’ button.
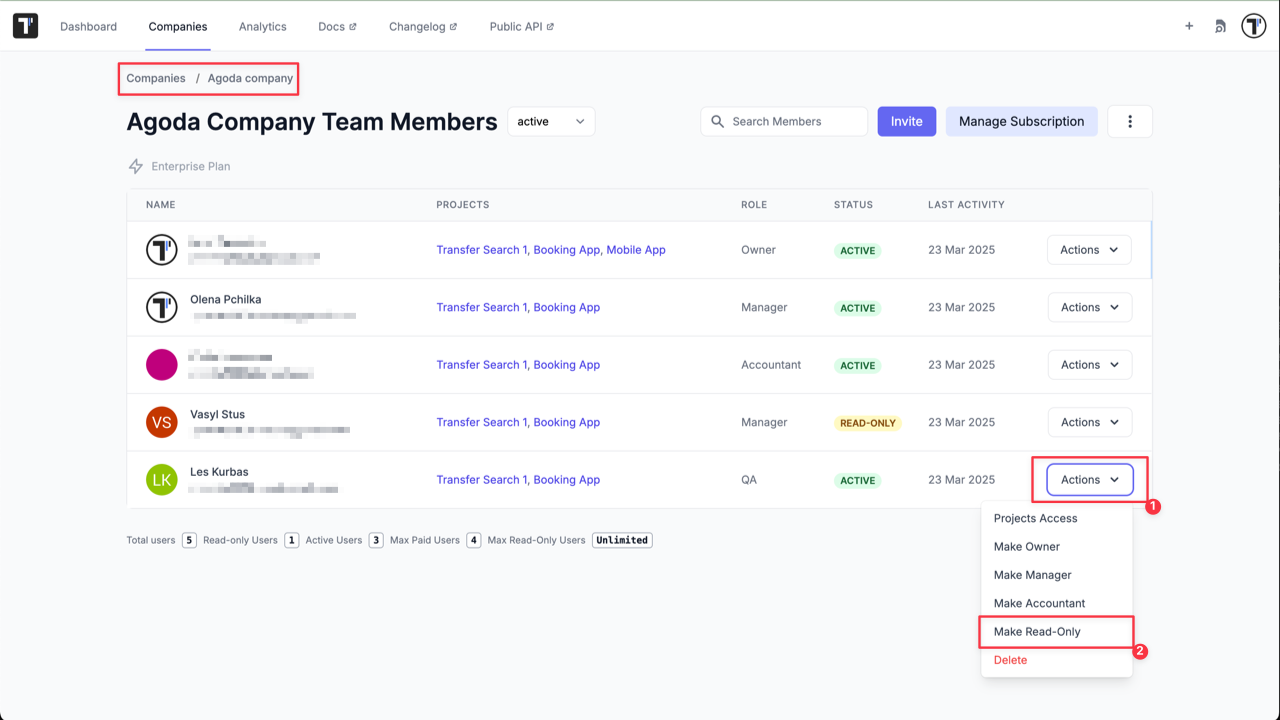
Make a Company Member Read-Only
Section titled “Make a Company Member Read-Only”- Click on ‘Actions’ button for selected member from Company page.
- Click on ‘Make Read-Only’ option from the dropdown menu.
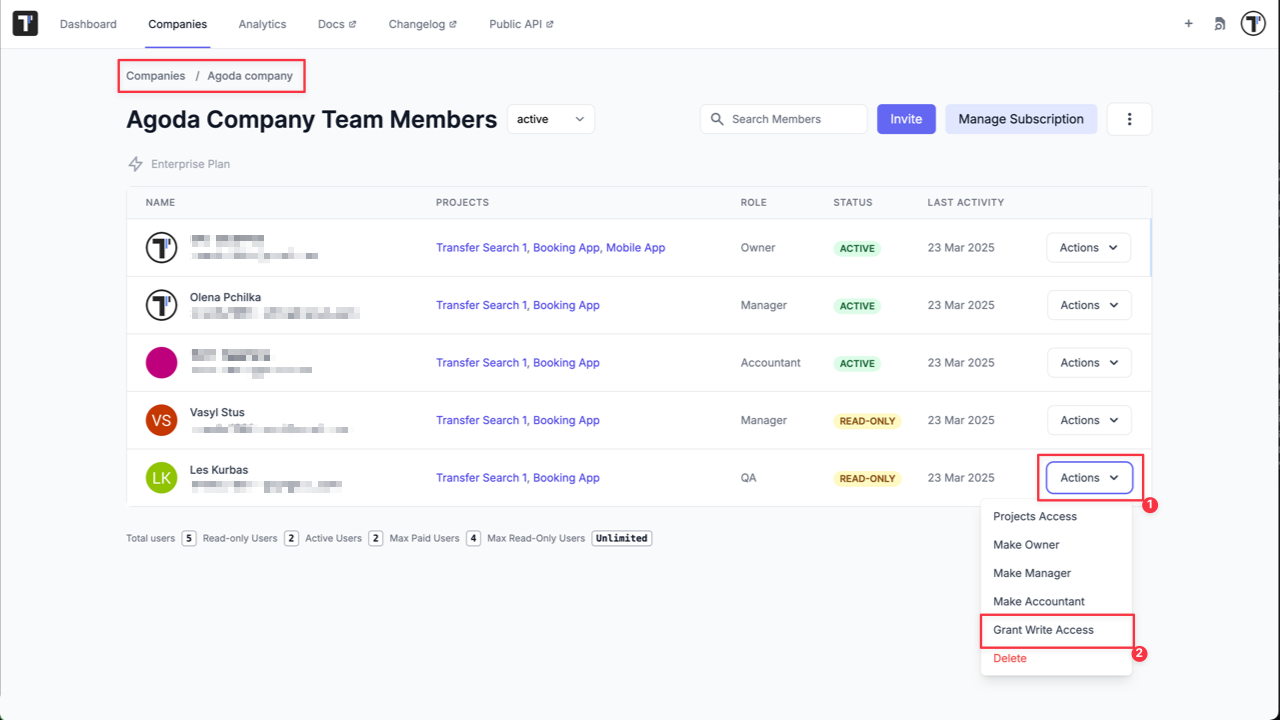
Make the Read-Only Users a Member
Section titled “Make the Read-Only Users a Member”- Click on ‘Actions’ button for selected Read-Only user from Company page.
- Click on ‘Grant Write Access’ option from the dropdown menu.
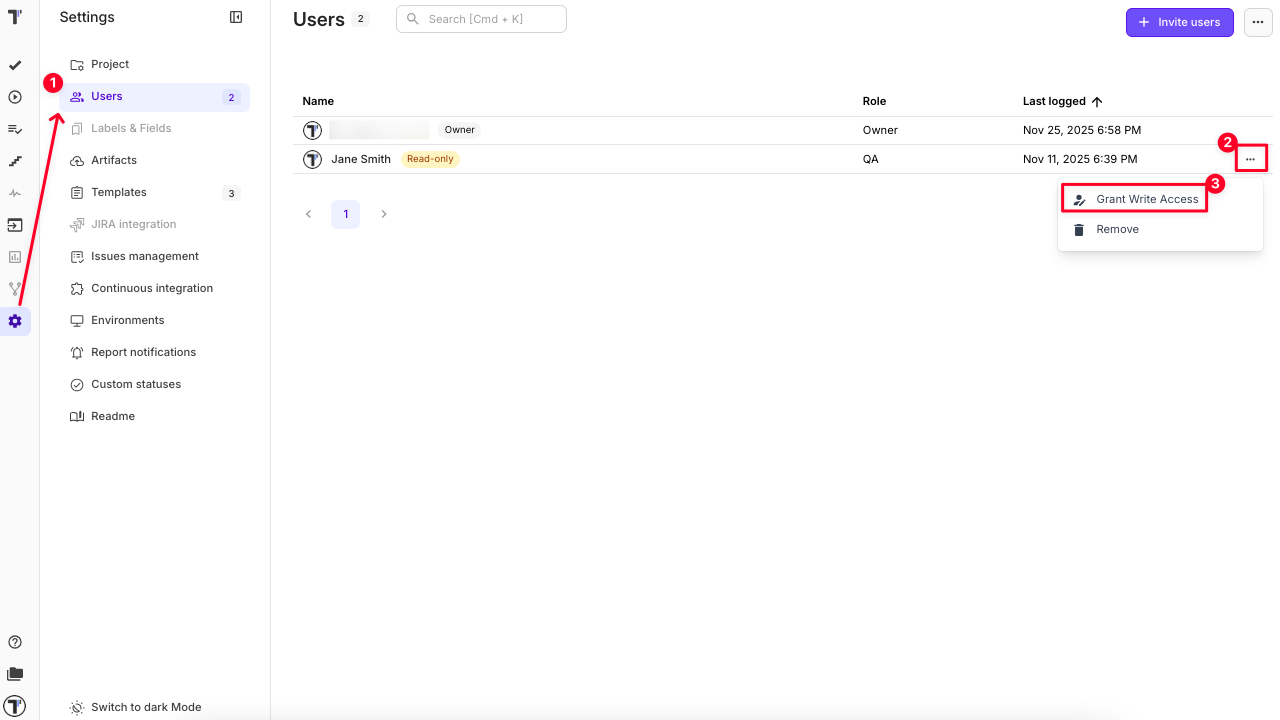
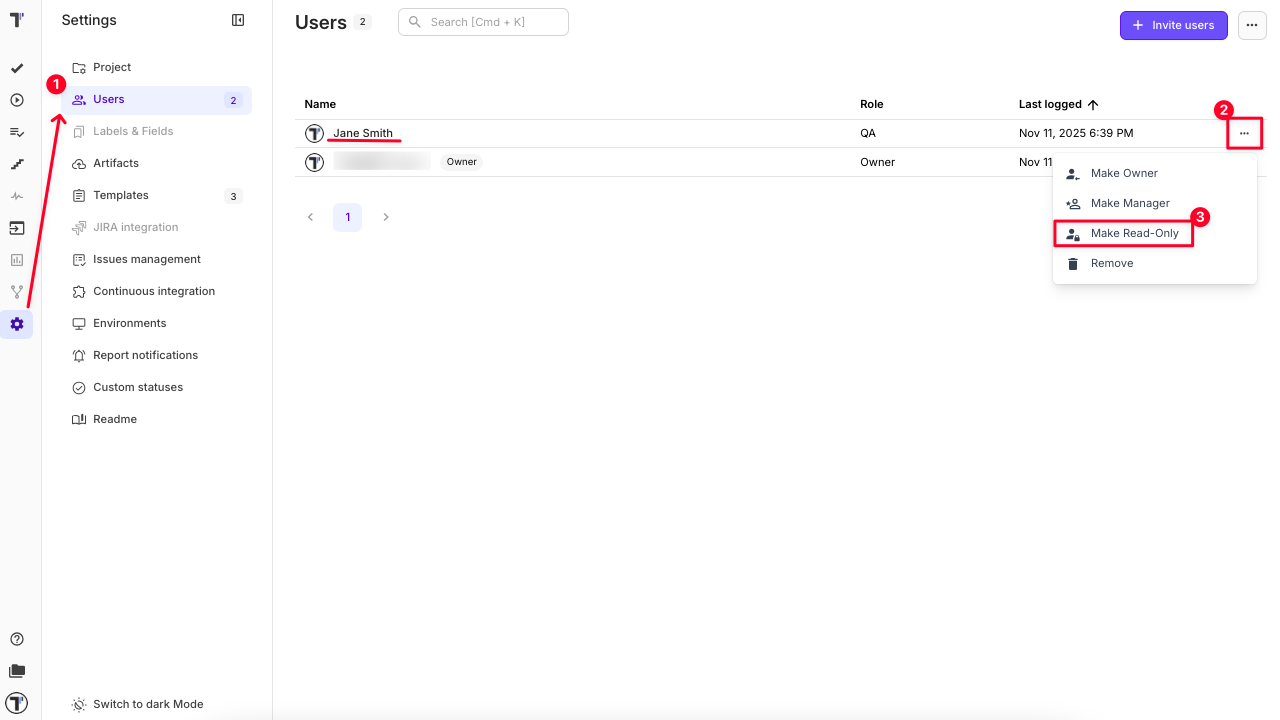
Make user read-only on project level
Section titled “Make user read-only on project level”- Go to Project Settings and open the Users tab.
- Click the three-dot menu next to the user’s name.
- Select ‘Make Read-Only’ from the dropdown options.
Make read-only user a regular user on project level
Section titled “Make read-only user a regular user on project level”- Go to Project Settings and open the Users tab.
- Click the three-dot menu next to the user’s name.
- Select ‘Grant Write Access’ from the dropdown options.